OVERVIEW
The primary purpose of a Quiz is to test end users' knowledge of one or more subjects. As a Quiz, answers can be scored as 'right' or 'wrong', and on completion the employee can receive a ‘score card’ with their results.
A Quiz provides you with a way to test the knowledge of your staff around a particular topic - examples could include Compliance, Health and Safety policy or just a fun trivia quiz.
CONSIDERATIONS
The Quiz Channel is only available with the Engage Package; for further information please inquire with your Customer Success Manager.
CREATE A QUIZ
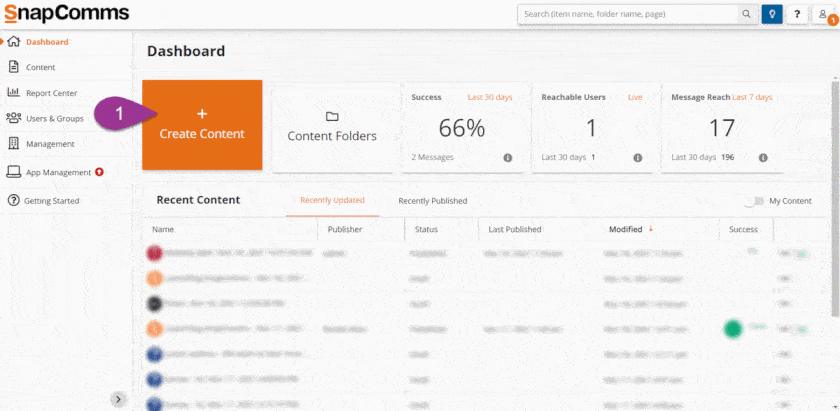
1. On your Dashboard click Create Content
2. Select Build Your Own and choose Quiz
3. Select a Theme to use with the Quiz
4. Select a folder to save the content in, give the Quiz a name and click on Start
4.b. Or using the Start drop-down, select Start as Organization Template
QUIZ EDITOR
This section covers the Quiz Settings and Editors. Refer to the numbers on the image below for locations.
1. Content Editor
Navigate through the different views of your Content using the tabs at the top: Content, Pop-up and Feed View.
-
Content: view and edit your main content in this view.
-
Pop-up: view and edit the Pop-up notification in this view.
-
Feed View: view and edit the App feed content summary in this view (All or Unread).
Note: Pop-up is only available if the notification type is set to Pop-up notification (default)
In the Content Editor you can add and edit questions and pages. To see how, scroll to the How-to section of this article.
Click on Show all Quiz pages to display all Quiz pages.
2. Designer Mode
Access the Designer mode by clicking on the Design icon:
In this mode you can Drag & Drop modules such as Images, Slideshows, Text boxes, Videos and Separators onto your Quiz.
Any module dragged onto the Header, body or Footer will appear on all pages and your Completion page. Any module dragged onto the Body will appear on all pages excluding the Completion page. Learn more on how to edit your completion page here.
Note: Modules can only be added to the Header, Footer and Body. To edit your questions, see here.
3. Content Settings
Those settings are available from the Content Editor. If you are in the Designer mode, editing a page or a question, exit those first:
Set the parameters for publishing your content. They are the following:
-
Targets: select who will receive this content.
-
Date and time: choose when this content will be visible by recipients.
-
Notification: set how, how long and how often this content will appear to recipients.
-
Delivery: specify the mediums used to deliver your content.
4. Quiz Settings
In Quiz settings you can manage responses behavior, display/hide progress indicators and rename buttons.
-
Show question number: every question will display the question number.
-
One response per user: users will be able to submit their responses only 1 time.
-
Allow users to see their responses in the Message History: users can see their quiz responses within the SnapComms App.
-
Keep responses anonymous: responses are collected and displayed anonymously in reporting. This setting cannot be disabled once the quiz has been published
-
Remove from Message History after user submit results: once submitted, the quiz will disappear from the SnapComms App.
-
Display page counter next to Next/Previous buttons: users can see their progress in the Quiz when this is enabled.
-
Button Label update fields: There are 4 editable fields. By default they are: Submit, Close, Next and Previous.
5. Display Settings
In Display settings, you can control how the Quiz looks and displays to users (Quiz participants).
There are 4 tabs in Display settings:
-
Size and location: control the size of your Content and Pop-up (if notification type = Pop-up). Change position and display mode of your Content and Pop-up.
-
Background: control the background type (color or image) and border style of your Content. Control the background and border color and border size of your Pop-up.
-
Style: change and customize the Theme for this content.
-
Settings: rename, select a different language for content-related messages and change your Content display animation.
HOW-TO
This section covers the How-tos of the Quiz. Use the table below for quick navigation:
- How to add a page
- How to delete a page
- How to add a question
- How to edit a question
- How to change the question type
- How to add response options
- How to delete a question
- How to edit a completion page
- How to show the score
- How to Preview my Quiz
- How to Publish my Quiz
- How to view my Quiz results
Add a page
For longer quizzes you can add pages to organize and distribute your questions.
To add a page:
- Click on Show all Quiz pages to display all your pages
- Hover over a question to display the Edit icon - click on it to display the question controls
- Locate the Add new page icon and click to add a new page
- Adding a new page will create a blank question on this page. You can edit or delete the question or drag & drop questions from another page onto the newly created page.
- The Quiz height is determined by the tallest page in the Quiz.
Delete a page
You can only delete pages without questions. Pages with questions will not offer the option to delete the page. You must move (Drag & Drop) or delete questions from the page before attempting to delete a page.
To delete a page:
- Click on Show all Quiz pages to display all your pages
- Click on the page to edit
- Click on the bin icon to Delete the page
Add a question
To add a new question, click on the question directly above where you want to add your new question and locate
Add new question icon:
Your new question is added on the same page. To move it to another page or reorder within the page, use the Drag & Drop icon and drag the question to the desired location:
To add a question to an empty page, click on the page to edit and click on the icon to add a new question:
Edit a question
To start, click on the question you wish to edit. This opens the right sidebar editor where you can edit the question, change the question type, add a description to your question, specify the correct response (where applicable) and make the question mandatory (Required question).
There are 2 ways to edit your question title:
-
Sidebar editing
Within the right sidebar editor, Click to add a question title.
-
Inline editing
Edit the question title by clicking on Click to add a question title within your quiz.
To change the formatting of your question, go to Display Settings and Style. Toggle ON Customize theme for this content. The question formatting is controlled by Heading 3.
To add a description to your question, click on + Add description under the question editing field in the right sidebar editor. Once the description text box is added, the description can be edited in this box or inline directly in your Quiz.
Change the question type
In Quizzes you can choose from 3 question types:
- Multiple choice: multiple options are offered to the participants. Only 1 response can be selected. The correct response is specified when editing the question
- Single answer: participants can respond to the question by adding a short response text (e.g. a name). A correct response text can be added when editing the question. It is not case-sensitive.
- Free-form answer: participants can respond to the question within the text box. Note: there is a 500-character limit to display in full in the Detailed responses report.
To change your question type, click on the question to edit it. This opens the right sidebar editor, from where you can select your Type using the drop-down menu:
Add response options
Multiple choice questions offer multiple responses participants can choose from. Refer to the section above to learn how to change the question type.
There are 2 ways to add response options to a question:
To start, click on the question you wish to edit. This opens the right sidebar editor.
-
Sidebar editing
Within the right sidebar editor, under Responses, Click to add an option. There are 2 fields by default. Add all following options as required using the + Add response.
-
Inline editing
Edit the response option by clicking on Click to add an option. You cannot add a new option, use the Sidebar editing to add a response option.
To reorganize your response options, use the Drag & Drop icon:
To specify the correct response to the question, tick the relevant response option:
To change the formatting of your response options, go to Display Settings and Style. Toggle ON Customize theme for this content. The response options formatting is controlled by Paragraph.
Delete a question
To delete a question, click on the question to delete then click on the red bin icon:
You can also delete a question from the right sidebar editor. Click on the question to delete and within the right sidebar editor click on more options and Delete question
Note: the question is deleted as soon as you press Delete. If you have pressed Delete by error, use the Undo button next to Preview once to bring your question back.
Edit a completion page
You can edit your completion page by clicking on the page. This opens the right sidebar editor when you can rename your completion page, add an image and add a description. The Description text box Editor supports HTML formatting.
There are 2 ways to add images to your completion page:
-
Clicking on + Add image
The image is added between the page title and the description.
To change how your image is displayed, use the Edit icon next to the loaded image in the right sidebar editor:
Go to Size and location and disable Size to content to see more options.
-
Using the Text Editor in the page description
Place your image within the description box by using the Insert image button in the Text editor.
To change how your image is displayed, select the image in the description text box and click on Insert image again to see more options under Size.
You can also resize or move your image within the text:
Show the score
You can choose to show employees how well they have done on the Quiz.
To make the score visible:
- Click on Show all Quiz pages to display all your pages
- Scroll to the completion page and click on the page to edit
- Locate "Show results table after submission" in the right sidebar editor. This will add a results table to the completion page visible for employees to see their scores and the correct responses after they have submitted the quiz.
Preview your Quiz to review your design and test your responses before publishing. The Preview shows the content as it would display on employees’ screens.
To preview, click on the eye icon next to the Designer Mode or the Preview button next to Publish (or Submit for moderation if you have limited administrator permissions)
In Preview, use the sharing options to send this preview to someone who does not have access to the SnapComms Content Manager. You can share a link or send an email from the Preview page.
Publish my Quiz
Once happy with your settings (Targets, Date and time, Notification, Delivery), design and Quiz flow, click on Publish.
Note: If you do not see the Publish button, you have limited administrator permissions. Submit your quiz for moderation by clicking on Submit for moderation. This content will join the moderation queue and be published by an administrator with moderation and publishing permissions.
View my Quiz results
Once published and after participants have started answering your quiz, you will be able to see their responses and scores by clicking on the reports icon and Success Report.
Comments
0 commentsArticle is closed for comments.